Creating a dummy project
I created a very simple project, droneDemo, to show how to set up Continuous Integration
on drone.io for Dart projects. The code can be found here on Github.
droneDemo defines just two methods, add() and multiply(). These
can be found in lib/. Tests for these methods can be found in test/. The
pubspec.yaml file needs to declare a unittest dependency for these tests to
work.
This is about as simple a project as you can have and there is little need for explanation. But it is worth delving into 2 points:
1) You should add packages to your .gitignore. This is to tell git not to
commit the symlinks created by pub to version control. These symlinks are
meaningful in the context of your filesystem but will trip drone.io.
If you already started your demo project and ended up with the symlinks, remove them.
2) drone.io needs a way to run all your tests. So far, Dart does not ship with a test runner, so you’ll have to cobble together something yourself.
Here’s what I did: my tests live in 2 different files, test/add_test.dart and
test/multiply_test.dart. I declared both files as libraries (see the library add_test;
and the library multiply_test; declaration at the top of each file) and
imported components from them into test/test_runner.dart.
import “package:unittest/unittest.dart”; import “add_test.dart” as add_test; import “multiply_test.dart” as multiply_test;
void main() {
 add_test.main();
 multiply_test.main();
}
So, calling dart test/add_test.dart or dart test/multiply_test.dart runs
only one test; calling dart/test_runner.dart runs both the tests.
With this out of the way, we can shift our attention to drone.io.
Drone.io: Basic Setup
Set up account at https://drone.io/signup.
On your dashboard, click on the New Project on the top right.
Pick Dart as the project language.
Pick Git as your Repository type.
Add the project name (I added droneDemo).
Add the Repository URL (mine was https://github.com/shailen/droneDemo.git).
Make sure your github repo is set to use the http method, not the ssh method.
Press Create.
Configuring your Build
After you press Create, you will be redirected to the script/config page.
Here, you will have to tell drone.io how to run your tests.
In the Commands section, type the following:
pub install
dart test/test_runner.dart
Remember test/test_runner.dart was our consolidating test runner? This is
where the trouble we went through sewing our tests together pays off.
Press Save and when you get the message that tells you the build was
successfully saved, press the blue Build Now button at the top.
A popup will appear with a Build Output link. Click that link.
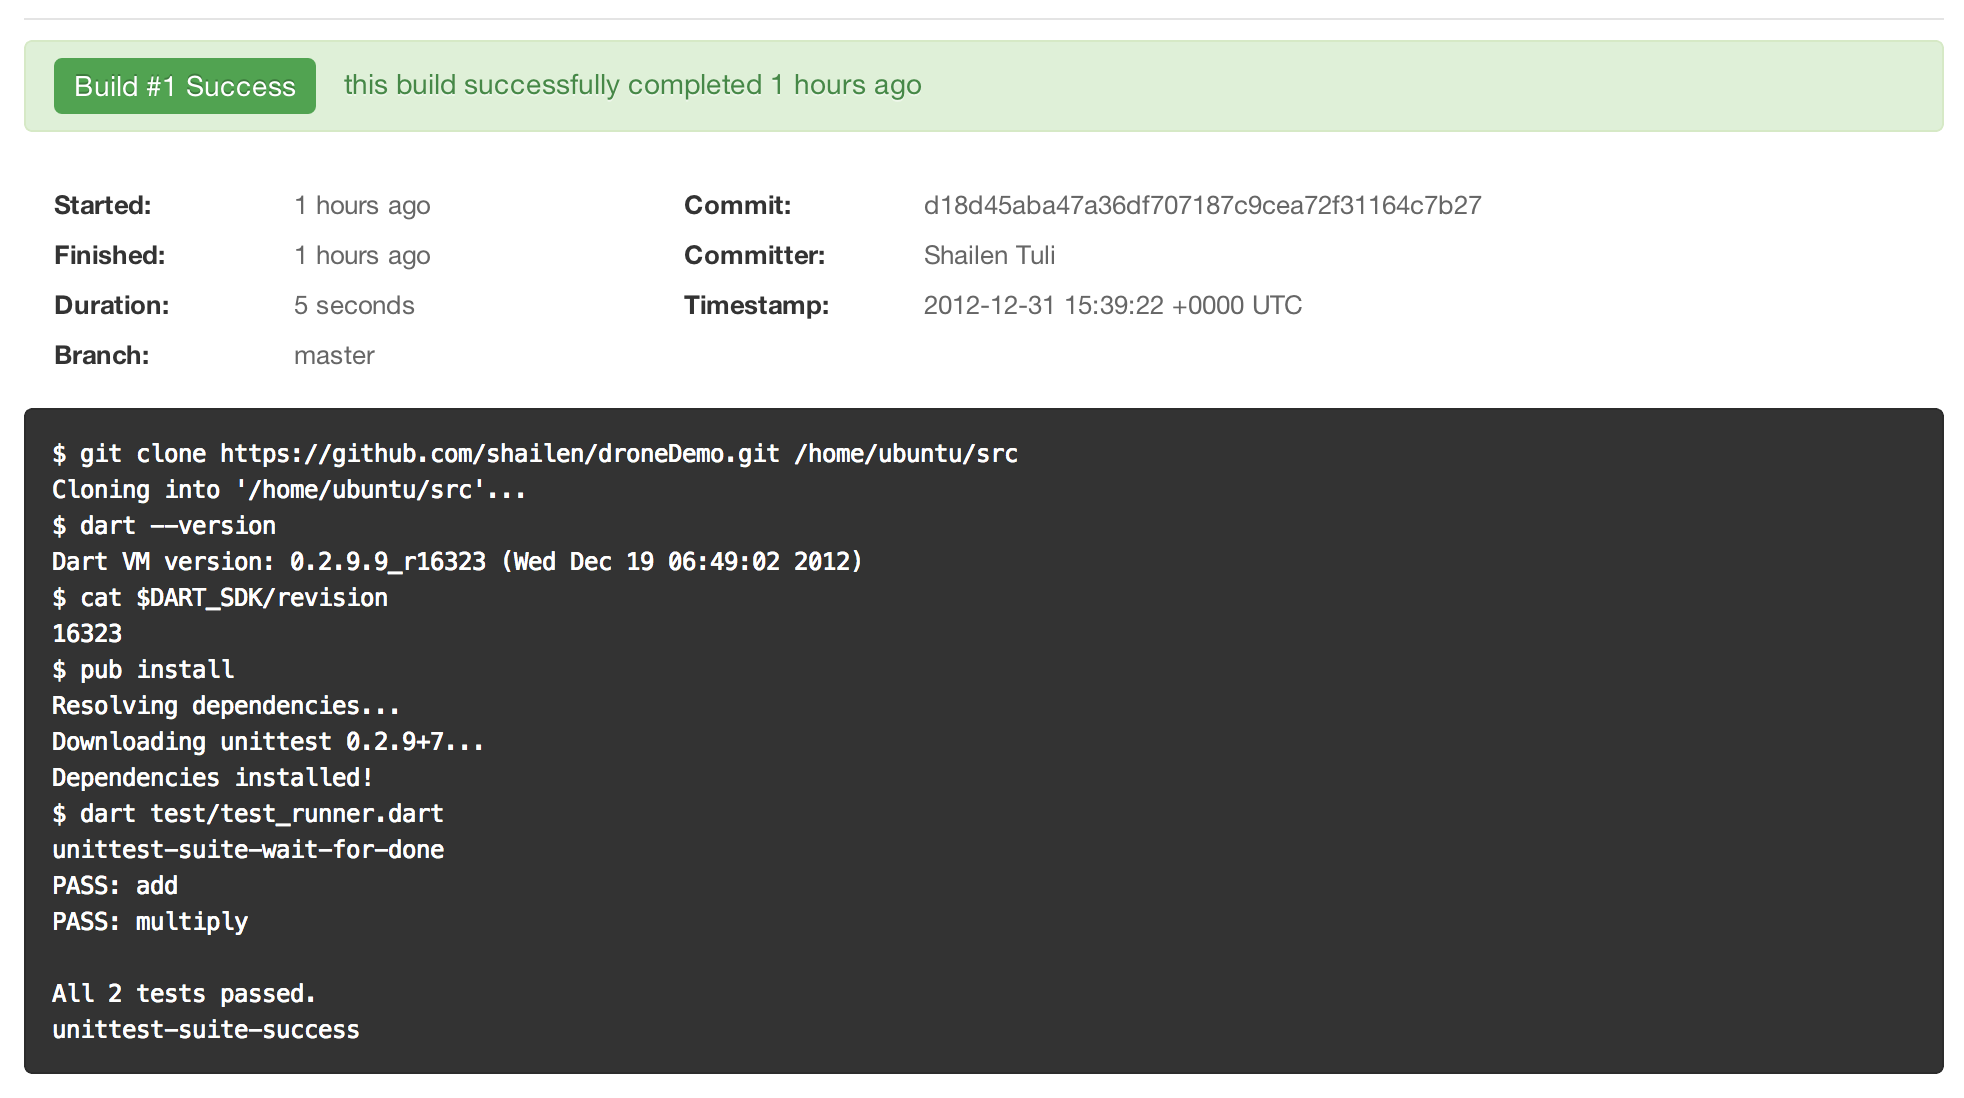
Voila! You are swimming in a sea of green!

My build output can be seen at: https://drone.io/shailen/droneDemo/1
Setting up Continuous Build
Click on settings for your drone.io project
Click on General in the left column. You will see a couple of links under Build Hooks. Copy the top one.
Now, go back to your project on github. Mine is at https://github.com/shailen/droneDemo.
Click on Settings.
Click on Service Hooks (left column).
Click on the WebHook Urls link at the top.
Paste the build hook you had copied earlier in the text input box provided
and press Update Settings.
From now on, every time you commit to your project on github, drone.io will run all your tests.
I changed one of my tests so that it was failing and pushed to github. No
surprise, the build now show Failed (https://drone.io/shailen/droneDemo).